Schlieren Imaging: Difference between revisions
| Line 15: | Line 15: | ||
[[File:Whole real setup.jpeg|720px|Whole real setup]] | [[File:Whole real setup.jpeg|720px|Whole real setup]] | ||
The source and the knife-edge are clearly shown below. A black cover is used to block the stray light so that it will not influence the imaging process as the light from the aperture is relatively too weak. There is a bright blue dot on the knife edge. That is the | The source and the knife-edge are clearly shown below. A black cover is used to block the stray light so that it will not influence the imaging process as the light from the aperture is relatively too weak. There is a bright blue dot projected on the knife edge. That is half art of the minimum waist radius of the beam. So when the air density changes, the sharp pattern will move up and down and cause the image brighter or darker. | ||
[[File:source setup.jpeg|720px|source setup]] | [[File:source setup.jpeg|720px|source setup]] | ||
Revision as of 13:22, 27 April 2022
Idea
Schlieren Imaging is a technique proposed by the German physicist August Toepler in 1864 to study supersonic motion. We are using this tool to see the ultrasound wave and its propagation. The sound wave is propagation by the vibration of the air. When the air vibrates, the air will be either denser or less.
Setup
Version 1
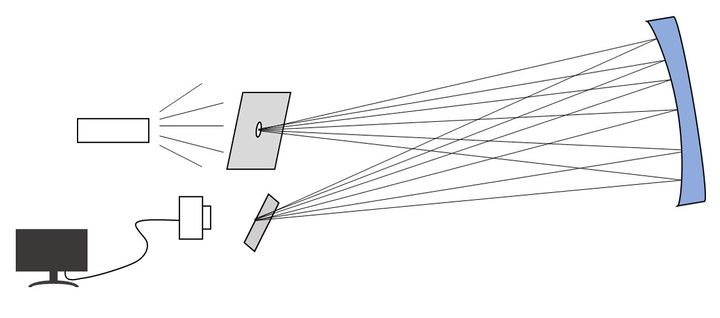
The optical setup is shown below.
The light source is a high-power LED that drives at about 3V 3A. There is an aperture in front of the led to block most of the light and make the source a point source. A concave mirror is located at 2f from the source. The concave mirror has a small angle to the instance beam. So the reflected light will go beside. There is a knife-edge at the reflection path about 2f from the concave mirror. Its function is to block half of the beam. A camera is located behind the knife edge to view the image.
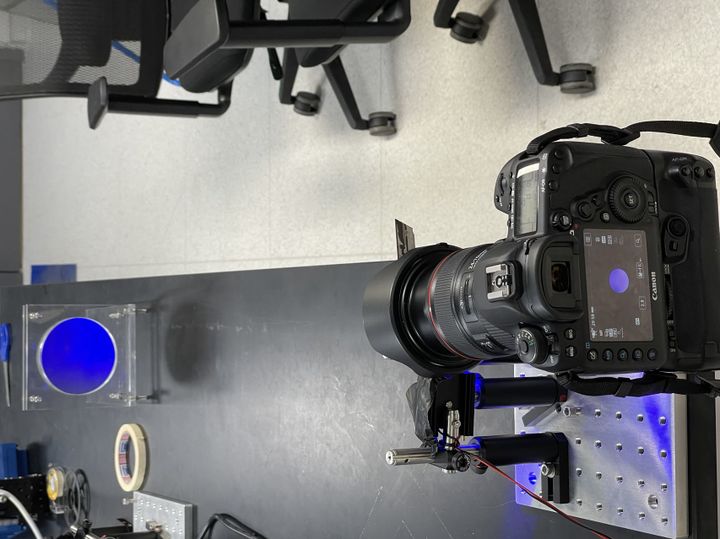
The picture of the real setup looks like below. The concave mirror is on the left hand of the picture while the camera, knife-edge, and the source are on the right-hand side.
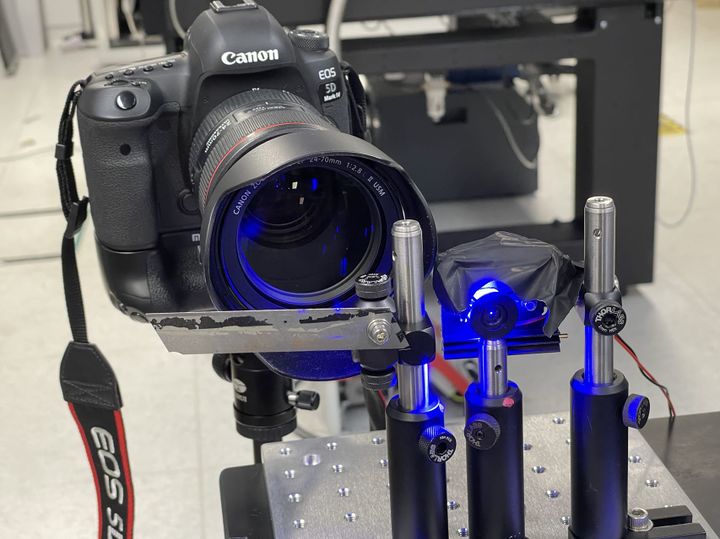
The source and the knife-edge are clearly shown below. A black cover is used to block the stray light so that it will not influence the imaging process as the light from the aperture is relatively too weak. There is a bright blue dot projected on the knife edge. That is half art of the minimum waist radius of the beam. So when the air density changes, the sharp pattern will move up and down and cause the image brighter or darker.
Version 2
Measurements
....


